
Showing posts with label farmhouse deep energy retrofit. Show all posts
Showing posts with label farmhouse deep energy retrofit. Show all posts
Friday, July 20, 2012

Saturday, April 7, 2012
SBF #23 Heat Distribution - Equality for all
Here is the simple distribution system for Sunnybrook Farm. Minuteman f11 aluminum fans in the wall. 55cfm. I believe this is a 25Watt fan, which is more than it should be. We are undercutting doors 3/4", and they will be open most of the time.
I have heard a someone testing directional air flow distribution using smoke, who found that blowing the air from the cool space to the warm space at ground level, works the best. We are sucking air at the ceiling because of the ability to work the airflow with closed doors and because we don't have transoms to allow air to flow through at the ceiling. The cold air will be pushed back out under the doorways
I have heard a someone testing directional air flow distribution using smoke, who found that blowing the air from the cool space to the warm space at ground level, works the best. We are sucking air at the ceiling because of the ability to work the airflow with closed doors and because we don't have transoms to allow air to flow through at the ceiling. The cold air will be pushed back out under the doorways
 |
| south den with fan above door |
 |
| fan wiring |
 |
| in north bed, fan above door |
SBF #22 Make as few penetrations as you can- electrical on the exterior wall
 |
| Exterior wall free of wires or holes |

Making a renovation airtight is a challenge. Using the Airtight Drywall Approach is also challenging because people are used to making lots of holes in this layer. So re-designing the electrical distribution in the exterior wall becomes an issue.
It's great in that you can eliminate all penetration sealing by not having electrical outlets and switches in the wall. But figuring out another system can be just a tough.
I really like the idea of floor boxes, but apparently they cost around $40/box vs. the typical $1.50 electrical box.
I decided to try putting the outlets in the baseboard and switches attached to the wall in wood boxes. We have also designed any wiring runs and ceiling lights to run in grooves routed out in trim and faux beams.
The baseboard needed to be 2" thick and 6" tall to accomodate the thinnest two gang boxes with a little room for wires to pass around the box. The boxes have 1/4" mud rings for a two gang setup even if we have only one receptacle because we need to cover the two gang box. We used 1" barn board for the baseboard and had to build up the edges to get the 2" thickness.
Fastening the boxes to the 1" baseboard was challenging to get a secure attachment to allow for the pressure of installing the boxes. Using 2" stock and routing a groove for wire and cutting out for boxes would be a better design.
 |
| Cap to baseboard is not shown |

 |
| 3 wires into each box |
Another way to achieve this goal of not penetrating the exterior wall with electrical boxes is to build a utility chase on the inside of the exterior wall either making the wall 2 1/2" thicker or using that much less insulation. One way to do this is to use chipboard as interior air barrier and frame another wall to the interior, which becomes utility chase and then finish sheetrock on the interior face of that. I find that method to take a lot of time and resources and rather like to see the outlets in the baseboard instead of the wall. It also makes accessing the electrical easier.
Tuesday, April 3, 2012
#21 SBF search and seal
Part 1- Resolving the melting spots
In the last post I described how I was able to see the melted spots on the roof and identify escaped heat. How exactly the heat was escaping and why was somewhat unknown.
I assumed air was allowing the heat to get through the envelope above the top of a wall on the second floor. We found that the wall plate penetrated the envelope creating a thermal break and the air sealing was not great. This was confirmed with a blower door test. We were able to see and feel warm air coming from underneath the ceiling sheetrock. It was warm air we were able to see because it was not very warm in the house and it was a sunny day, so the heat from the metal roof was coming in through the cracks. This was later in the day and all the morning frost was melted from the roof.
I also felt into the cavity around the cellulose where the melted spots were seen. So the insulation contractor offered to come back to densify the area I was concerned with. I retaped the seems around where the new cellulose was injected, caulked the ceiling sheetrock/plastic air seal and called it good. apparently the sheetrock did not make a good seal with the gasket that seal it to the plastic air barrier that was taped to the top plate of the existing wall.
The tape was not ideally used here either as the top plate was rough cut wood which it not really appropriate for taping to. Unfortunately, caulk is the best method for sealing to this.
On the next frosty morning we had a light snow. It was accumulating everywhere lightly and the house was warm. The spots of concern were not melting! This was a good sign. It was also noticed that the last areas that were not air sealed around the entry doors, because they were just installed, were melting, showing the warm air's path of least resistance.
Part 2 - The first blower door test.
This test was conducted before all air sealing was done and the plumbing lines were all open so we were not able to get any numbers. But we did find our leaks after most visual air sealing was complete. What we found:
1. a gasket on the upstair door to the cold attic has a gasket on backwards and was letting air in under the door.
 2. The seal to the top plate of the 2nd story bearing walls had leaks. Some from the Siga tape to the rough sawn top plate and some from the ceiling sheetrock to the plastic air barrier connector. This work was not done under supervision and the siga tape was being asked to do a little too much to stick to the rough sawn wood.
3. The vaporblock seal taped connection of the 10 mill plastic air seal connector to the handhewn wood sill that sits on the granite foundation. Poor tape for the job. Probably needed to be adheared with some kind of caulk.
4. The site built bulkhead door was not gasketed. Easy fix, add gasket.
5. The second floor joists penetrated the sheetrock air barrier and were taped with Siga tape. Taping to rough sawn wood is not working.
 6. The rebated, double gasketed Linnwood doors were tight except at the bottom corners were the adjustable sill sweep met the side gaskets. They did not overlap or join together and air was allowed to leak.
7. There was also some expected leaking at the taped joints of the plastic air barrier in the basement. The 3M red tape was inferior to the Siga tapes. I tried the economical approach with just using the red tape, but will have to reseal spots with better tape. I will be trying a more local importer of quality tapes - Pro-Clima tapes from FourSevenFive in NJ.

In the last post I described how I was able to see the melted spots on the roof and identify escaped heat. How exactly the heat was escaping and why was somewhat unknown.
I assumed air was allowing the heat to get through the envelope above the top of a wall on the second floor. We found that the wall plate penetrated the envelope creating a thermal break and the air sealing was not great. This was confirmed with a blower door test. We were able to see and feel warm air coming from underneath the ceiling sheetrock. It was warm air we were able to see because it was not very warm in the house and it was a sunny day, so the heat from the metal roof was coming in through the cracks. This was later in the day and all the morning frost was melted from the roof.
I also felt into the cavity around the cellulose where the melted spots were seen. So the insulation contractor offered to come back to densify the area I was concerned with. I retaped the seems around where the new cellulose was injected, caulked the ceiling sheetrock/plastic air seal and called it good. apparently the sheetrock did not make a good seal with the gasket that seal it to the plastic air barrier that was taped to the top plate of the existing wall.
The tape was not ideally used here either as the top plate was rough cut wood which it not really appropriate for taping to. Unfortunately, caulk is the best method for sealing to this.
On the next frosty morning we had a light snow. It was accumulating everywhere lightly and the house was warm. The spots of concern were not melting! This was a good sign. It was also noticed that the last areas that were not air sealed around the entry doors, because they were just installed, were melting, showing the warm air's path of least resistance.
Part 2 - The first blower door test.
This test was conducted before all air sealing was done and the plumbing lines were all open so we were not able to get any numbers. But we did find our leaks after most visual air sealing was complete. What we found:
1. a gasket on the upstair door to the cold attic has a gasket on backwards and was letting air in under the door.

3. The vaporblock seal taped connection of the 10 mill plastic air seal connector to the handhewn wood sill that sits on the granite foundation. Poor tape for the job. Probably needed to be adheared with some kind of caulk.
4. The site built bulkhead door was not gasketed. Easy fix, add gasket.
5. The second floor joists penetrated the sheetrock air barrier and were taped with Siga tape. Taping to rough sawn wood is not working.
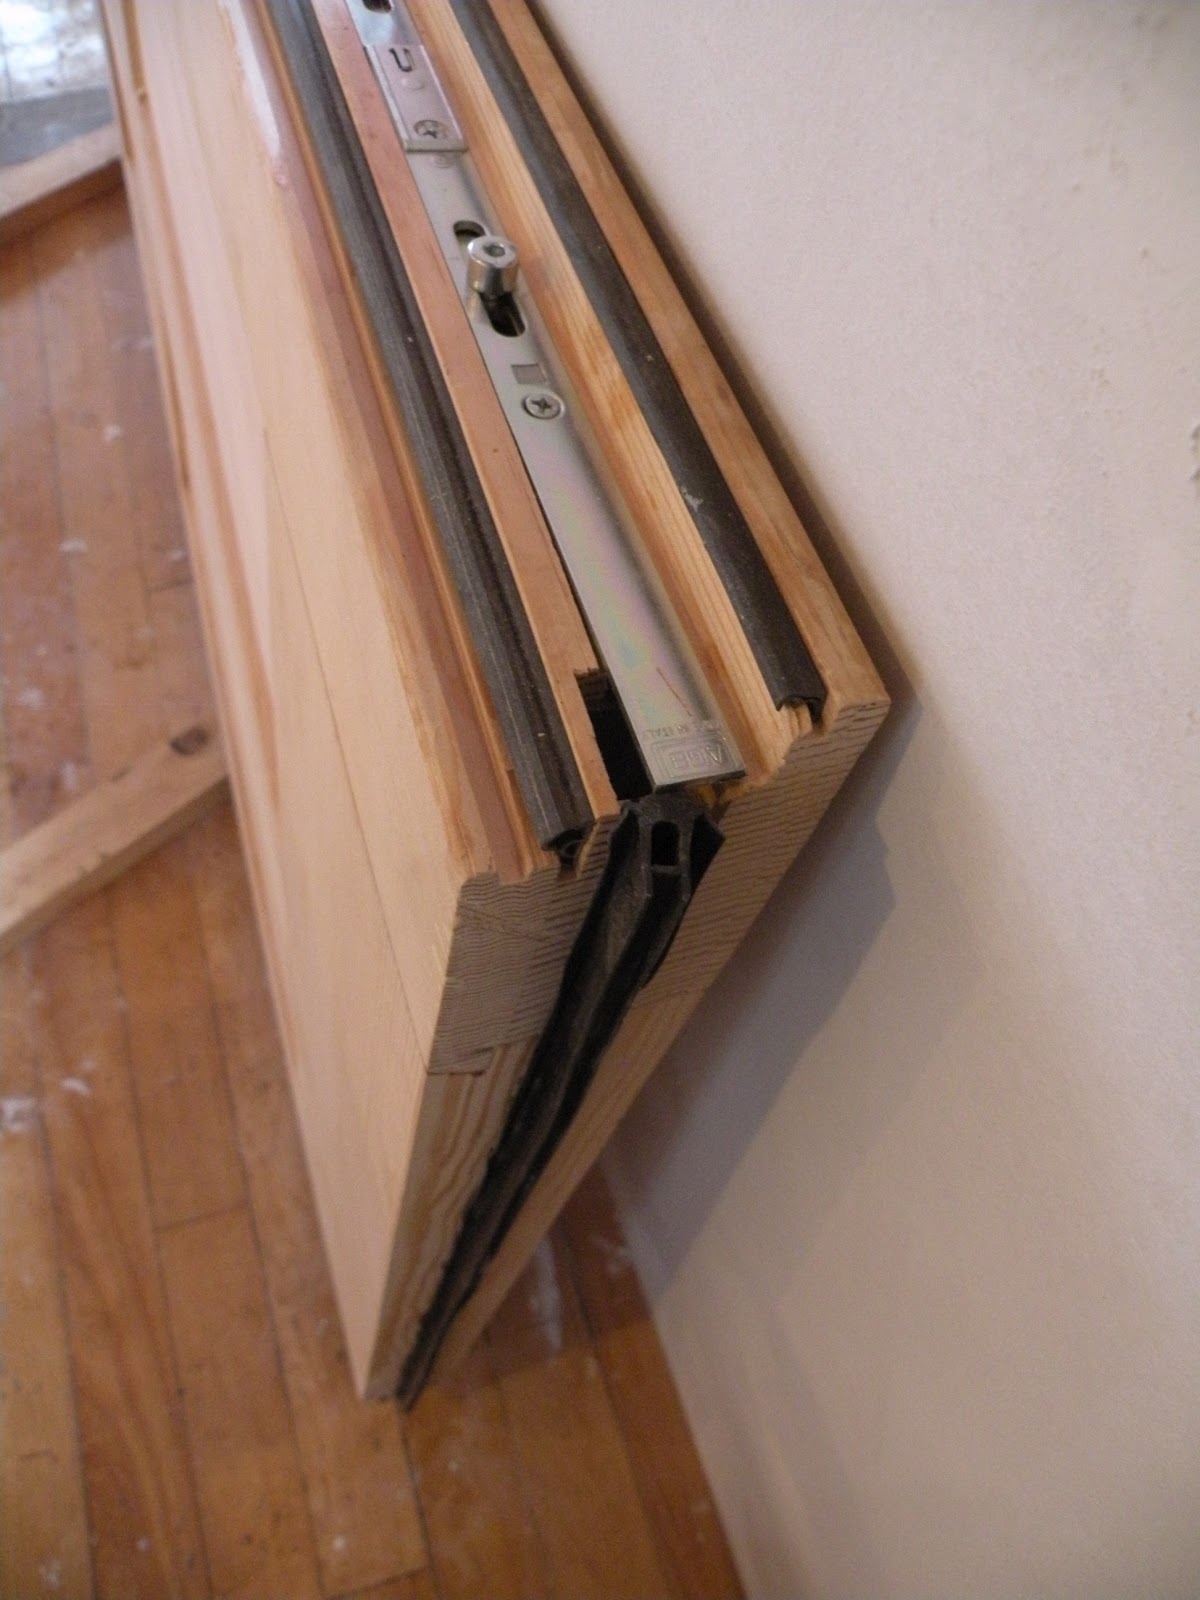
7. There was also some expected leaking at the taped joints of the plastic air barrier in the basement. The 3M red tape was inferior to the Siga tapes. I tried the economical approach with just using the red tape, but will have to reseal spots with better tape. I will be trying a more local importer of quality tapes - Pro-Clima tapes from FourSevenFive in NJ.

Wednesday, February 8, 2012
SBF# 20 Escaped heat

How can you tell if your insulation and air sealing is effective?
On this cold morning there was a frost on the roof. And where heat was getting through, you could see the frost melted. I caught this shot this morning after it was noticed a week earlier.
So what is going on here?
The melt spots are where the hallway wall meets the top of the sloped ceiling and the flat ceiling on the 2nd floor. On further inspection, I found that the top plate of this wall actually penetrates the plane of the slope, where on the other side there is no wall and no melted areas.
I also found some air leakage where a piece of tape failed to stick to the top plate.
So the next question is does a little bit of air leakage and a 4" thermal break on an 18" cellulose cavity result in this kind of heat escape or is there perhaps some gap in the cellulose? The installer did check this area with an IR camera, but it was done when we had a much smaller stove and not a large of a temp difference as we currently are running.
What do you think?
I will follow up as we get to the bottom of this one.
SBF# 19 Local, Natural and Reused Materials
Today we made a lot of decisions around using local, natural materials for finishes. Most of it revolved around the kitchen design, which is being coordinated with Eyrich Stauffer of Worcester, Vt.
In order to make design decisions about the materials used for the kitchen cabinets and counter tops, we wanted to coordinate with the other finishes that would be impacted by these decisions and make sure everything worked together.
This included the wood floor, wood trim on the cieling, panelling on the back side of the bar- along the coat shelf and both the closet and book shelf at either end of the kitchen.
Eyrich initially suggested butternut from Vermont Wildwoods that sells Vermont forest salvaged butternut, for the cabinets. Jan liked the look of this wood along with soapstone counters. While Vermont Soapstone used to supply the stone from Vermont quarries and plans to in the near future, currently their stone comes from Brazil. Wayne likes the idea of using a more local slate. We'll see how that turns out soon, but we did come to agreement on using local pine for the floors, and planing the barn boards from the site for the paneling and window trim. We are having a tough time identifying this 100+ year old wood and are thinking in the range of fir or hemlock.
We also decided to resaw some of the old timbers from the barn into countertop material and trim for the ceiling. The tight grain of the spruce and pine is exquisite.
We found that these woods will create a consistent aesthetic throughout the house and have a similar yellow brown hue that will have a warm and relaxed feel.
Stay tuned for the post on clay plasters in the Dining/Living Room.
In order to make design decisions about the materials used for the kitchen cabinets and counter tops, we wanted to coordinate with the other finishes that would be impacted by these decisions and make sure everything worked together.
This included the wood floor, wood trim on the cieling, panelling on the back side of the bar- along the coat shelf and both the closet and book shelf at either end of the kitchen.
Eyrich initially suggested butternut from Vermont Wildwoods that sells Vermont forest salvaged butternut, for the cabinets. Jan liked the look of this wood along with soapstone counters. While Vermont Soapstone used to supply the stone from Vermont quarries and plans to in the near future, currently their stone comes from Brazil. Wayne likes the idea of using a more local slate. We'll see how that turns out soon, but we did come to agreement on using local pine for the floors, and planing the barn boards from the site for the paneling and window trim. We are having a tough time identifying this 100+ year old wood and are thinking in the range of fir or hemlock.
We also decided to resaw some of the old timbers from the barn into countertop material and trim for the ceiling. The tight grain of the spruce and pine is exquisite.
We found that these woods will create a consistent aesthetic throughout the house and have a similar yellow brown hue that will have a warm and relaxed feel.
Stay tuned for the post on clay plasters in the Dining/Living Room.
Monday, February 6, 2012
SBF# 18 PHPP
I have recently completed a 9 day intensive Passive House Training with Katrin Klingenberg mostly in order to learn the Passive House Planning Package (PHPP)
I am currently using this rehab as an excercise and will post the results. Passive House Institute does have a separate track for retrofits called EnerPHit. If you are interested in this check here http://passipedia.passiv.de/passipedia_en/certification/enerphit.
I am currently using this rehab as an excercise and will post the results. Passive House Institute does have a separate track for retrofits called EnerPHit. If you are interested in this check here http://passipedia.passiv.de/passipedia_en/certification/enerphit.
SBF# 17 Closing In
Most of the air sealing is complete.
The 1st floor is being mudded and taped, the 2nd floor is done. We need to seal the basement and root cellar doors. We are anxiously waiting for our 2 Linnwood, rebated, double gasketed doors. And the 2nd floor joist penetrations need to be sealed. Then we are ready for the blower door.
We did notice some spot melting on the roof where a wall met the sloped ceiling. I found a couple of old wiring holes through the top plate and an unsealed seam. But the melting seemed unlikely with such small air leakage given the 18" of cellulose. Upon closer inspection I noticed the top plate actually broke the line of the sloped ceiling, meaning we have a little thermal break here. I'd say the top plate pushes into the ceiling about 4". I am thinking that a few leftover foam pieces could easily fit between the studs to make up for the penetration.
One sign that the envelope is getting tight is that the plastic in the basement is billowing inward as the wood stove is sucking out the air. We will not notice this once the basement insulation is installed, but we are holding off for now until we do the blower door test.
The 1st floor is being mudded and taped, the 2nd floor is done. We need to seal the basement and root cellar doors. We are anxiously waiting for our 2 Linnwood, rebated, double gasketed doors. And the 2nd floor joist penetrations need to be sealed. Then we are ready for the blower door.
We did notice some spot melting on the roof where a wall met the sloped ceiling. I found a couple of old wiring holes through the top plate and an unsealed seam. But the melting seemed unlikely with such small air leakage given the 18" of cellulose. Upon closer inspection I noticed the top plate actually broke the line of the sloped ceiling, meaning we have a little thermal break here. I'd say the top plate pushes into the ceiling about 4". I am thinking that a few leftover foam pieces could easily fit between the studs to make up for the penetration.
One sign that the envelope is getting tight is that the plastic in the basement is billowing inward as the wood stove is sucking out the air. We will not notice this once the basement insulation is installed, but we are holding off for now until we do the blower door test.
Saturday, December 24, 2011
SBF# 16 The Art of Transition
Transformation from a Transitioneer.
The idea of renovation these days is perhaps not very fashionable, but is certainly considered more desireable in terms of achieving lesser developmental impact. I will also argue that the outcome of a renovation can hold a much more rich feeling in terms of character and energy.
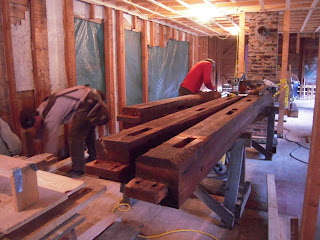
Below you can see the dismantling of the newer half of the barn, recutting it to fit into its new home in the house, and its new place, replacing some of the load bearing walls to create an open floor plan for the dining/kitchen area.


So how do we look and renovation from an ecological perspective. I will briefly outline my process.
First the concept and idea, to transform the old farmhouse into a new home for Transitioneers(http://en.wikipedia.org/wiki/Transition_Towns).
Then it is crucial to have and apply goals:
A place that relies on its local resources gently.Build on/with what we have.
A place that is connected to its ecology greatly.
While these goals may seem simplistic, far too often, goals are not articulated or referenced with regard to major decisions. The resulting decisions often become relegated to the bottom line short term economics or personal whim.
There are many management processes that can be applied to the process. I will suggest holistic management practices as a starting point.(http://en.wikipedia.org/wiki/Holistic_management)
Any process must utilize feedback.
This framework allows me to proceed in transforming a place in an efficient way. Because the process is dynamic, there is a constant need to reassess and question where things go to next and how to make it happen.
Jan had a great idea to map where the original parts of the farmstead started and how they were reused, reintegrated with the renovation. Or not.
Below are a few elements that would be on the map.
 Here is the original threshold,
 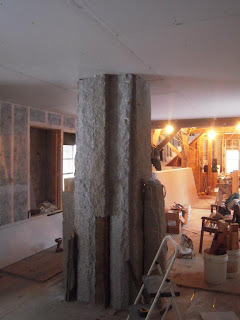 flopped onto the ground from its place on top of the foundation. This was removed when we took off the south sun room that was not part of the original house, and made the front door into a window.
This granite slab was sliced in two and veneered onto the chimney seen on the right.
The evolution of materials within the project show a overall effort to use what is available. This is an important part of an ecological/permacultural approach to building or renovating. It comes from the idea that any new materials involves harvesting and work creates a greater impact on the environment. So a first and important consideration is within the realm of material observation/assessment. From there, you need to know what you want to create. This brings up many opportunities for creative design which facilitates a dynamic process.
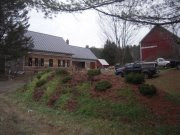
Here, you can see a sound berm along Route 14 created by debris consisting of plaster and unfinished wood that would otherwise be hauled and landfilled or burned. It is important to make certain you are not burying any toxic materials in this type of recycling. That includes plastics; metal; materials with chemical additives such as pressure treatments.
Ecological renovations (transformation/transition) start with what is existing and change form and materiality in an efficient process that takes advantage of what is there. Ecological transformations are essentially a change in design that utilize basic materials in ways that create more connected and durable relationships with the environment. ETs do not rely on outside inputs and machines to drive and maintain conditions.
Considering the difference between renovating and building new in terms of impact, transformational thinking with regard to development can make a big dent in our overall impact on the environment.
The idea of renovation these days is perhaps not very fashionable, but is certainly considered more desireable in terms of achieving lesser developmental impact. I will also argue that the outcome of a renovation can hold a much more rich feeling in terms of character and energy.
Below you can see the dismantling of the newer half of the barn, recutting it to fit into its new home in the house, and its new place, replacing some of the load bearing walls to create an open floor plan for the dining/kitchen area.
So how do we look and renovation from an ecological perspective. I will briefly outline my process.
First the concept and idea, to transform the old farmhouse into a new home for Transitioneers(http://en.wikipedia.org/wiki/Transition_Towns).
Then it is crucial to have and apply goals:
A place that relies on its local resources gently.Build on/with what we have.
A place that is connected to its ecology greatly.
While these goals may seem simplistic, far too often, goals are not articulated or referenced with regard to major decisions. The resulting decisions often become relegated to the bottom line short term economics or personal whim.
There are many management processes that can be applied to the process. I will suggest holistic management practices as a starting point.(http://en.wikipedia.org/wiki/Holistic_management)
Any process must utilize feedback.
This framework allows me to proceed in transforming a place in an efficient way. Because the process is dynamic, there is a constant need to reassess and question where things go to next and how to make it happen.
Jan had a great idea to map where the original parts of the farmstead started and how they were reused, reintegrated with the renovation. Or not.
Below are a few elements that would be on the map.
 Here is the original threshold, flopped onto the ground from its place on top of the foundation. This was removed when we took off the south sun room that was not part of the original house, and made the front door into a window.
This granite slab was sliced in two and veneered onto the chimney seen on the right.
The evolution of materials within the project show a overall effort to use what is available. This is an important part of an ecological/permacultural approach to building or renovating. It comes from the idea that any new materials involves harvesting and work creates a greater impact on the environment. So a first and important consideration is within the realm of material observation/assessment. From there, you need to know what you want to create. This brings up many opportunities for creative design which facilitates a dynamic process.
Here, you can see a sound berm along Route 14 created by debris consisting of plaster and unfinished wood that would otherwise be hauled and landfilled or burned. It is important to make certain you are not burying any toxic materials in this type of recycling. That includes plastics; metal; materials with chemical additives such as pressure treatments.
Ecological renovations (transformation/transition) start with what is existing and change form and materiality in an efficient process that takes advantage of what is there. Ecological transformations are essentially a change in design that utilize basic materials in ways that create more connected and durable relationships with the environment. ETs do not rely on outside inputs and machines to drive and maintain conditions.
Considering the difference between renovating and building new in terms of impact, transformational thinking with regard to development can make a big dent in our overall impact on the environment.

Friday, December 16, 2011
SBF# 15 Air sealing details
 on the Pella windows I used Siga corvum 12/48 tape to connect the window frame to the foil face of the iso foam and Siga Rissan tape to the interior frame. Drywall gasket will be stapled to the tape and sealed to the drywall around the window. The Siga tapes are amazingly sticky. The Rissan tape is also stretchy to make good seals at the corners. It also has a mesh reinforcement.
 This is the Siga 12/48 Corvum tape showing the 12mil section that is folded back to easily connect to the side of the window frame. The 48mil section is peeled and stuck to what ever surface you have next to the window frame. In this case the iso foam.
Here is an air barrier carried over the top plate of an interior bearing wall with gasketing to seal the drywall to.
The drywall is gasketed at all edges. At the bottom plate, a gasket is sealed to 10 mil vaporblock, which is carried to the basement.
 This detail seals the beam penetration to the frame and used the drywall gasket to seal the drywall around the beam.
More air seal details to come....
SBF# 14 Granite chimney

The chimney is complete with the granite facing from the barn foundation.
The slabs were cut in half at a local granite shop and mortared and tied to the chimney.
Friday, November 11, 2011
SBF # 13 Heating & Ventilation come together
I believe that everyone is on board for the basic heating and ventilation systems.
Their current plan is as follows:
Heat- Primary - Margin wood cook stove
Backup - Electric element powered hydronic radiators(size to be determined) that would pull from upper coil in a Wagner 105gal tank.
Hot water - Wood cook stove direct to tank/solar to bottom coil in tank
Backup - Electric element
Ventilation - 2 bathroom exhaust only fans(Whispergreen/Fantech) on Grasslin intermittent timer and a kitchen exhaust with 4 Aldes passive inlet vents and a dedicated stove supply.
We decided not to use the spot ERV's because they operated as "exhaust only" for most of the time when it is cold when they will primarily be used, so the extra cost doesn't seem worth it. This fan might work better in a more temperate climate. It was a tough decision to give up the efficiency of the whole house HRV for the simplicity and economy of the passive vents.
The AC part of HVAC will be passive, using shades and manual operation of windows. The earth coupled basement will also contribute to cooling.
Below is the schematic from Karl Rosengrant, who works with Greenworks Solar. Probably the most interesting part is the controller on the radiant heat dump loop that will supply heat to the bathrooms and kitchen to keep the plumbing warm when the wood stove is out. The controller is connected to the solar controller, which has a read on the temp in the tank. This allows the controller to turn on the heat dump based on both the temp in the bathrooms/kitchen or the temp of the water.

Their current plan is as follows:
Heat- Primary - Margin wood cook stove
Backup - Electric element powered hydronic radiators(size to be determined) that would pull from upper coil in a Wagner 105gal tank.
Hot water - Wood cook stove direct to tank/solar to bottom coil in tank
Backup - Electric element
Ventilation - 2 bathroom exhaust only fans(Whispergreen/Fantech) on Grasslin intermittent timer and a kitchen exhaust with 4 Aldes passive inlet vents and a dedicated stove supply.
We decided not to use the spot ERV's because they operated as "exhaust only" for most of the time when it is cold when they will primarily be used, so the extra cost doesn't seem worth it. This fan might work better in a more temperate climate. It was a tough decision to give up the efficiency of the whole house HRV for the simplicity and economy of the passive vents.
The AC part of HVAC will be passive, using shades and manual operation of windows. The earth coupled basement will also contribute to cooling.
Below is the schematic from Karl Rosengrant, who works with Greenworks Solar. Probably the most interesting part is the controller on the radiant heat dump loop that will supply heat to the bathrooms and kitchen to keep the plumbing warm when the wood stove is out. The controller is connected to the solar controller, which has a read on the temp in the tank. This allows the controller to turn on the heat dump based on both the temp in the bathrooms/kitchen or the temp of the water.

Saturday, October 22, 2011
SBF #11 - Ventilation/AQ
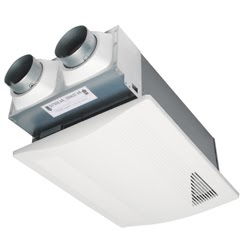
This post is likely to be controversial.
Against the recommendation of Andy Shapiro, who likes whole house ventilation. We will probably install 2 Panasonic FV-04VE1 Spot ERV's with low(66% @ 30 CFM ) efficiency and with max. 40 cfm each.
From panasonic:
WhisperComfort may also be suitable to meet whole house ventilations requirements under ASHRAE 62.2.
The American Society of Heating, Refrigerating and Air Conditioning Engineers (ASHRAE) set a standard for whole house ventilation, requiring that continuous mechanical ventilation be 7.5 CFM per bedroom (master bedroom x 2) plus 1 CFM per 100 square feet, with sone level not to exceed 1.0
Sunnybrook Farm: 2 beds + 1600 sq feet =38.5 cfm
We also are knocked out of Energy Star rating because we will not have kitchen exhaust(because there will be an electric stove, maybe with recirc. filter) and the ventilation is not above 50cfm. Again, the Panasonics are rated at 40cfm.
Reasoning-
1. The owner doesn't like the idea of installing all the ductwork for whole house system. He would prefer to open a window.
2. The house is small enough to get decent exchange with the two spot ERV's in the bathrooms.
3. The cost installed will be less than half of a whole house system.
We will also be supplying the woodstove with dedicated air supply with a thermostatically controlled damper on the intake.
The root cellar will also have thermostatic controls for ventilation.
It will be interesting to see how the blower door test turns out. If we are below 1ACH50, I think it could be useful to monitor the AQ. Check back for results.
I believe this design is only possible with a house that uses non-toxic finishes and materials that utilizes a free water vapor (or breathing) wall design. This means no vapor block in the walls/cieling. The air barrier must therefore be of a material that can allow water vapor to pass through but virtually no air to pass. We will be using 5/8" sheetrock. Clay and lime plasters also work and there are wood fiber boards that can do the same trick.
Friday, October 21, 2011
SBF#10 Windows are ordered

We decided on Serious fiberglass 725/525 series casement and awning windows with Pella wood clad "Natural Sun" windows on the south dining and den walls for the feel of wood.
Favored "H"(high solar gain) windows on the south/east and west and "L" to the north.
Specs:
Serious: double pane with heat mirror suspended film
Casement 7L : uframe-0.17 shgc-0.32 - North side
7H: uframe-0.19 shgc-0.56 - West/East side
Fixed 5H: uframe-0.18 shgc-0.57 - South side
Casement 5H: uframe-.22 shgc-0.57 - South side
Pella: double pane
fixed: uframe-0.30 shgc-0.56 "Natural sun" glass - south
casement: uframe-0.32 shgc-0.48 "Natural sun" glass - south
awning: uframe-0.29 shgc-0.27 "Advanced Low e" glass - 1 north window
29 windows for under $20K, spent a little more than budgeted(OK 27% over)
But not bad considering quality
Other considerations:
Fibertec -2nd(almost went with them- longer lead time did it, I think)
Thermotec - 3rd(too expensive for budget)
Optiwin-Energate-Linwood and more.
Now the doors....................
Linwood from Maine gave a decent quote for insulated wood entry door with 1/2 glass, multipoint latch and double gasket seal.
Looking at another local millwork shop in Barre, Vermont.
Hope to decide this next week.
Thursday, September 1, 2011
SBF#9 What makes it a Deep energy retrofit.
In the last couple years this element has really become an interesting challenge for me. After a couple of years of immersing myself in energy geek world, I get to bring a lot of retrofit ideas together with a lot of freedom because of the depth to which we gutted the farmhouse. Interestingly, the old balloon framing style has helped with the fact that we are leaving the exterior skin on and insulating to the inside, which is typically the least favored option in terms of how to add insulation to the walls. I should say that this retrofit favors natural materials over petrol and chemical based ones.
So a deep energy retrofit for me means increasing energy efficiency by over 75%. To achieve this we are installing:
1. a continuous air barrier - ADA-sheetrock on the interior.
All electrical on exterior walls will be run on interior of sheetrock in wood chases.
2. 12" of cellulose in the walls(R42).
3. R20 on the foundation perimeter and floor.
4. A thermal envelop that minimizes thermal breaks.
5. R5 or better windows.
6. R80 ceiling with cellulose.
The energy analysis will be done under the mentorship of Andy Shapiro who will be bringing many years of experience in understanding the modeling of energy and moisture in the new design in order to make a predictable outcome.
The goal of the deep energy retrofit is basically to reduce the energy consumption of the house as much as possible with a modest budget through intelligent design to remove a dependence on fossil fuels, reduce carbon output and to conserve resources. We will track metrics such as the tightness of the house once we have completed the envelope as well as yearly use of fuel and power. The Passive House model is attractive, but not quite the right fit for this project. I believe the owners need to be 100% behind that kind of a focus. It will certainly inform much of the design. Passive and low impact design are a top priority for my design process in general. One of the things many people misunderstand about passive design is that it relies most on people's behavior more than the actual design. This means it will be much more difficult to design our way out of our current crises than to change our behavior.
We also see this project as a transition town model for sustainable design. This means there is no reliance on fossil fuels in the design other than through the electrical grid. It also means there is an integrated design that includes ecological processes such as food production and nutrient recycling with a composting toilet and greywater system.
Heat will be from passive solar and wood with an electrical heat pump for backup and hot water will be supplied by the cookstove and solar panels. PV panels will eventually supply electric power.
There is also provisions for food storage in the root cellar and a cold pantry. The greenhouse will extend the growing season to support a healthy homesteading operation for food production. Rainwater catchment will also passively support irrigation in the well drained soils rather than rely on the well pump.
 The crew.
So a deep energy retrofit for me means increasing energy efficiency by over 75%. To achieve this we are installing:
1. a continuous air barrier - ADA-sheetrock on the interior.
All electrical on exterior walls will be run on interior of sheetrock in wood chases.
2. 12" of cellulose in the walls(R42).
3. R20 on the foundation perimeter and floor.
4. A thermal envelop that minimizes thermal breaks.
5. R5 or better windows.
6. R80 ceiling with cellulose.
The energy analysis will be done under the mentorship of Andy Shapiro who will be bringing many years of experience in understanding the modeling of energy and moisture in the new design in order to make a predictable outcome.
The goal of the deep energy retrofit is basically to reduce the energy consumption of the house as much as possible with a modest budget through intelligent design to remove a dependence on fossil fuels, reduce carbon output and to conserve resources. We will track metrics such as the tightness of the house once we have completed the envelope as well as yearly use of fuel and power. The Passive House model is attractive, but not quite the right fit for this project. I believe the owners need to be 100% behind that kind of a focus. It will certainly inform much of the design. Passive and low impact design are a top priority for my design process in general. One of the things many people misunderstand about passive design is that it relies most on people's behavior more than the actual design. This means it will be much more difficult to design our way out of our current crises than to change our behavior.
We also see this project as a transition town model for sustainable design. This means there is no reliance on fossil fuels in the design other than through the electrical grid. It also means there is an integrated design that includes ecological processes such as food production and nutrient recycling with a composting toilet and greywater system.
Heat will be from passive solar and wood with an electrical heat pump for backup and hot water will be supplied by the cookstove and solar panels. PV panels will eventually supply electric power.
There is also provisions for food storage in the root cellar and a cold pantry. The greenhouse will extend the growing season to support a healthy homesteading operation for food production. Rainwater catchment will also passively support irrigation in the well drained soils rather than rely on the well pump.
 The crew.
SBF #8 Sunnybrook farm design comes together

The design has evolved nicely as we have spent time disassembling the farmhouse. This time allows us to see all the perspectives and sit with ideas for several days.
Some of the conceptual overtones that we have been working with are traditional farmhouse (imagine that) with a touch of modernity. Another term that has come up is rustic elegance.
 Some important ideas for me in this design is using what we have, and simplifying. Which means what ever we can recycle including sinks/toilets/copper/electrical fixtures and wood. It also means some really nice wood and granite from the barn. And it means other local materials from nearby.
In this view into the kitchen, you can see the reused barn beams and post.
This view looks into the Living/Dining room.

At the far end you can see the bedroom and Den which will have the hardwood floors that were retrofited some time ago. In simplifying we have removed the front porch and reduced the number of rooms by 2, removed a chimney, one vent stack and the kero boiler with all the baseboard.
 The 2nd floor will be largely similar to the original layout. We will refinish the original wide pine floors throughout the second floor, except maybe in the bathroom where it looks like we might have tile.
Some of the more interesting details include a dumbwaiter rootcellar; the granite veneer chimney and interior stone window sills.
The greenhouse and outdoor kitchen are last to evolve. More to come.....
SBF #7 The Barn is Recycled
Here are two tie beam solutions to join to the wall.
The older half of the barn used a lap joint onto the rafter plate which is holding up great.
The newer half decided to tenon into the top of the post below the plate, this resulted in a major blowout on the two middle posts, as seen below.
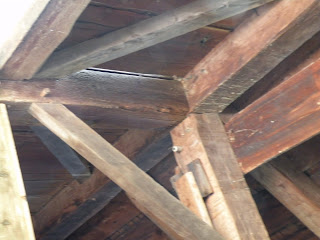

The siding is coming off well as Aliza and Donnie deconstruct the skin first exposing the frame. The typical two layers of siding include the 1/2" inner layer and the 1" outer layer which is painted red and has gotten a beautiful patina over the years.
 Still not sure where the siding will go, but the lower section looks promising as wainscote.
The frame will be used for structural beams in the Kitchen and Dining/Living Room. We will also use some pieces in the Kitchen floor and the outdoor kitchen.
The older half of the barn used a lap joint onto the rafter plate which is holding up great.
The newer half decided to tenon into the top of the post below the plate, this resulted in a major blowout on the two middle posts, as seen below.


The siding is coming off well as Aliza and Donnie deconstruct the skin first exposing the frame. The typical two layers of siding include the 1/2" inner layer and the 1" outer layer which is painted red and has gotten a beautiful patina over the years.
 Still not sure where the siding will go, but the lower section looks promising as wainscote.
The frame will be used for structural beams in the Kitchen and Dining/Living Room. We will also use some pieces in the Kitchen floor and the outdoor kitchen.
Monday, August 15, 2011
SBF #6 What we found in the old farmhouse.

The gypsum plaster was put on after the window trim, adding over 200 ft of potential air and water leakage. The prodigous amount of air leakage is known for preserving the wood frame in old buildings that spent over 5 and 10 cords of wood heating. The current air barrier scheme is to use ADA. (Airtight Drywall Approach) Gasketing the planes to each other. Dense pack cellulose will also slow down the air and water, and effectively store some water as a heat sink during the winter.
 The timber stud frame was balloon framed on the eave sides which are north and south. In the original house, the studs go two feet above the 2nd floor up to the rafter plate and on that sit 2x7 rafters on a 12/12 pitch. Floor joists are nailed to a floor ledger nailed to the inside face of studs with floor beams, square-hole joined to 4x10 stud-posts.
In the add-on kitchen here to the left, the rafter plate is closer to the 2nd floor. You can see the joinery here.
One of the issues with deep energy retrofits is that typically it is advatageous to add the insulation to the outside because of ease of creating a continuous insulative envelope and air barrier. This often makes sense where the exterior siding needs replacing.
In our case, the farmhouse exterior siding is in good condition. And knowing the cost of residing, I was thrilled to find the balloon framing from the interior that will allow us to build a continuous space for the cellulose to cover the outside edge of the floor ledgers.

And here is some of the wood lath that was spit from a board with a chisel. Seen sideways.

The Barn Revisited
I took some time and climbed into the upper frame of the barn. You can tell it was built in two sections by the side by side posts and rafters in the middle. 4 bays each side. The older side is closer to the house and has hand hewn tie beams and a few hewn rafters as well as a ridge beam. The newer side has no ridge beam and the tie beams are tenoned into the posts below the rafter plates. This has lead to the two posts in the middle of the newer half to split at the tie beam peg holes and mortise. The round rafters have pushed out over many winters splitting the posts about 3 feet down. Figuring they would need to be replaced and the subsequent costs we thought it would be easier to take down the newer side and leave old barn even though we really wanted to bring the hand hewn timbers inside.
The older barn side's tie beams were joined differently, by lapping onto the top of the rafter plate. The posts were intact, tenoning into the bottom of the plates.
It seemed more appropriate to leave the older frame that would last longer. And I realized that I should pass on the timbers from the old River Run. This would allow us to use some hewn timbers in the rebuild and be able to continue to see the hewn timbers in the barn.
The beginning of the renovation of the barn is underway.
The older barn side's tie beams were joined differently, by lapping onto the top of the rafter plate. The posts were intact, tenoning into the bottom of the plates.

It seemed more appropriate to leave the older frame that would last longer. And I realized that I should pass on the timbers from the old River Run. This would allow us to use some hewn timbers in the rebuild and be able to continue to see the hewn timbers in the barn.
The beginning of the renovation of the barn is underway.
Tuesday, August 9, 2011
What to do with the old barn?

The old barn frame is similar to the house. A combination of hand hewn spruce timbers with sawn ones. This was common in the 1870's as mills made sawn lumber more accessible. The long timbers were cheaper and easier to hand hewn while the shorter ones were sawn.
We are very interested to use the antique wood, especially hand hewn, in the retrofit of the house. But there is also a need for the barn space as Wayne is already working with a local CSA to share the barn space for overwintering animals.
Wayne wants a more practical space for storage and garage. The compromise seems to be to dismantle the older half of the barn for reusing wood while saving the newer half and renovating it to be more useable for current farm needs.
Subscribe to:
Posts (Atom)